
Introduction
Welcome to the culinary world of delicious recipes! Today, we’re diving into a timeless Southern favorite: Banana Pudding.
Whether you’re hosting a family reunion, attending a summer barbecue, or simply craving a sweet and creamy dessert, banana pudding is the perfect choice. Ready to get started? Let’s take a journey through its delicious layers while I share some tips and tricks along the way with our interactive AI chef, Elonore Chef IA!
Banana Pudding: A Brief History
Banana pudding has long been a beloved dessert in American homes, particularly in the Southern United States. Although bananas weren’t widely available in the U.S. until the late 19th century, once they made their way into American kitchens, they became an instant hit. Banana pudding quickly grew in popularity, especially after the introduction of boxed pudding mixes and vanilla wafers in the early 20th century.
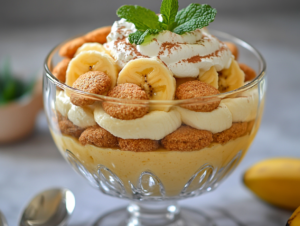
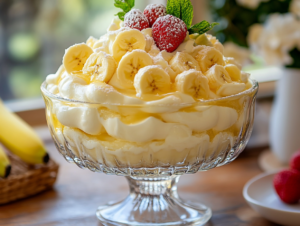
This recipe brings together layers of sliced bananas, rich vanilla pudding, and crisp vanilla wafers, all topped with fluffy whipped cream. Traditionally served chilled, banana pudding is now a must-have dish at family gatherings, church potlucks, and celebrations across the country.
Elonore Chef IA: “Now that you know the origins of this delightful dessert, let’s get our hands dirty (well, figuratively) and whip up your very own homemade banana pudding!”
Banana Pudding is Perfect for Any Occasion
Banana pudding shines as a versatile dessert, suitable for many different occasions:
- Family Gatherings: Its nostalgic charm makes it the perfect comfort food.
- Outdoor BBQs: Cool and creamy, it’s an ideal dessert for warm-weather events.
- Potlucks and Parties: Easily prepared ahead of time, it can feed a crowd.
- Weeknight Treats: A simple yet indulgent dessert for any day of the week.
Imagine serving this at your next summer picnic under the shade of a large oak tree, the creamy banana pudding providing a cool, refreshing bite after a day of fun in the sun.

Banana Pudding Recipe
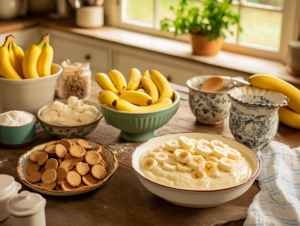
Ingredients You’ll Need:
- 4 ripe bananas, sliced
- 1 box of instant vanilla pudding mix (5.1 oz)
- 2 cups cold milk
- 1 can sweetened condensed milk (14 oz)
- 1 ½ cups heavy whipping cream (for whipped topping)
- 1 box vanilla wafers (11 oz)
- 1 tsp vanilla extract
- Pinch of salt
Optional Garnishes:
- Fresh banana slices
- Crushed vanilla wafers
- Whipped cream
- A drizzle of caramel sauce for an extra indulgent touch
Elonore Chef IA: “Pro tip: Make sure your bananas are just ripe — not too green, and not too brown. The perfect banana should have a few brown speckles but still be firm to the touch.”
Banana Pudding Recipe : Step-by-Step Instructions
-
Prepare the Pudding
In a medium-sized mixing bowl, combine the instant vanilla pudding mix and cold milk. Whisk until smooth and thickened, about 5 minutes.
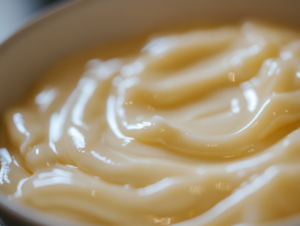
Elonore Chef IA: “Here’s where patience is key! Make sure your pudding thickens properly before moving on to the next step. This will ensure that your banana pudding has the right consistency.”
-
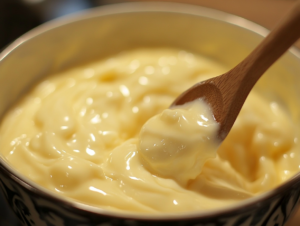
Add Sweetened Condensed Milk
Once your pudding has thickened, gently fold in the sweetened condensed milk and vanilla extract. Stir until everything is well-combined. The condensed milk will add extra creaminess and sweetness to the dish.
-
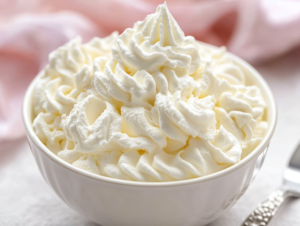
Whip the Cream
In a separate bowl, pour the heavy whipping cream and beat it with an electric mixer until stiff peaks form. This will take about 3-4 minutes. Be sure not to over-whip, as you want your cream to be light and fluffy.
-
Fold the Cream into the Pudding
Gently fold the whipped cream into the pudding mixture, taking care not to deflate the whipped cream. This will make your pudding light and airy while still rich and creamy.
-
Layer the Pudding, Bananas, and Wafers
Now comes the fun part — assembling the pudding! In a trifle dish or a large bowl, begin by spreading a thin layer of the pudding mixture at the bottom. Follow with a layer of vanilla wafers, then a layer of banana slices. Repeat this layering process until you’ve used all the ingredients, making sure to end with a layer of pudding on top.
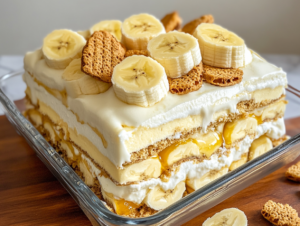
Elonore Chef IA: “Make sure your bananas are sliced evenly to ensure each bite has a perfect balance of pudding, banana, and wafer. And remember, presentation counts! Try to make those layers nice and neat.”
-
Chill the Pudding
Once your banana pudding is assembled, cover the dish with plastic wrap and place it in the refrigerator. Allow it to chill for at least 4 hours, or overnight if possible, to let the flavors meld and the wafers soften slightly.
-
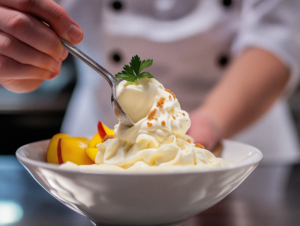
Garnish and Serve
Before serving, add a final flourish by topping your banana pudding with crushed vanilla wafers and fresh banana slices. For an extra touch of elegance, you can add a dollop of whipped cream or drizzle a bit of caramel sauce on top.
Elonore Chef IA: “Doesn’t that look amazing? The chilled pudding, combined with the creamy banana and crunchy wafers, is sure to be a crowd-pleaser at any event. Now it’s time to serve!”
Banana Pudding : Tips and Variations
- Vegan Version: Swap the dairy milk with almond or coconut milk and use a non-dairy whipped topping. You can also substitute the vanilla wafers with a vegan-friendly option.
- Gluten-Free Version: Use gluten-free vanilla wafers or another gluten-free cookie alternative for those with dietary restrictions.
- Add Some Flair: For a tropical twist, add a layer of toasted coconut flakes between the bananas and pudding. Or, for a richer flavor, incorporate a layer of caramel sauce between the pudding layers.
Serving Suggestions:
Banana pudding can be served in individual mason jars for a cute, portable dessert option. This is perfect for outdoor events like barbecues or picnics.
Elonore Chef IA: “Here’s another idea: add some shaved chocolate on top for a decadent, gourmet touch. Your guests will love the extra bit of indulgence!”
Nutritional Information (Per Serving):
- Calories: 400 kcal
- Protein: 6g
- Fat: 18g
- Carbs: 55g
- Sugar: 30g
The Event: Hosting a Summer Picnic
Picture this: It’s a warm, sunny afternoon, and you’ve set up a beautiful picnic in the park. You’ve got a spread of sandwiches, fresh salads, and for dessert — this irresistible banana pudding. As the sun sets and the cool breeze picks up, everyone gathers around to enjoy this refreshing, creamy treat. It’s the perfect way to end a summer day.
Elonore Chef IA: “Banana pudding is perfect for warm-weather events, especially outdoor picnics. Its cool, creamy texture contrasts beautifully with the heat of the day, making it a refreshing and light dessert.”
Banana Pudding Recipe : The Story
Banana pudding has deep roots in Southern culinary tradition. Originally, it was considered a luxury dessert due to the rarity of bananas in the late 1800s. As banana imports grew, so did the dessert’s popularity. Vanilla wafers, introduced in the early 1900s, became the perfect partner for the creamy pudding and soft banana slices, creating the classic dessert we know today.
Recipe Card
Banana Pudding Recipe
Prep Time: 20 mins | Chill Time: 4 hours | Servings:8
Ingredients:
- 4 ripe bananas
- 1 box instant vanilla pudding mix
- 2 cups cold milk
- 1 can sweetened condensed milk
- 1 ½ cups heavy whipping cream
- 1 box vanilla wafers
- 1 tsp vanilla extract
- Pinch of salt
Instructions:
- Prepare the pudding and fold in condensed milk.
- Whip the cream and fold it into the pudding.
- Layer pudding, bananas, and wafers in a dish.
- Chill for at least 4 hours.
- Garnish with wafers and bananas before serving.
Elonore Chef IA: “That’s it! You’ve just made a beautiful, classic banana pudding. Enjoy every bite, and don’t forget to share it with friends and family!”